 
Skinning
Tutorial Version 1.0
Since Stingray's
site seems to be permanently down and I can't find his tutorial anymore
and people keep asking for it, I decided to create my own Skinning Tutorial.
This is my first
attempt at making a tutorial. So please forgive me if something seems to
complicated. I try to write it as simple as possible.
First you have to
download and extract the tools. You can find the download
here.
Open your copy of
Winzip and click on 'Open'. The 'Open Archive' dialog pops up. Find your
cd-drive with the FAKK2 cd inserted. Doubleclick first on the folder 'install'
and after that on the folder 'fakk'. There should be two 'pk3' files. If
you don't see them make sure that you have selcted 'All files' in the dropdown
list 'File types'.
Select 'pak0.pk3'
and click on 'Open'.It should look something like this.

For this tutorial
we need files for the upper body of first skin the julie model uses. The
files are called:
julie1_skin1.ftx
Texture for lower body
julie2_skin1.ftx
Texture for upper body
julie3_skin1.ftx
Texture for the head
Select the 'julie2_skin1.ftx'
file and hit extract. In the extract to window select the 'skins' folder
located in the Skin Tutorial directory you just downloaded and extracted.
Make sure that 'Use folder names' is selected. You can click on 'Extract'
now.
The directory structure
should look like this:
If you want to change
another skin. For example the third one. That's the red battle suit. Extract
the 'ftx' files ending with 'skin3'. It's that simple.
Now move 'julie2_skin1.ftx'
to the 'bin' folder also located in the Skin Tutorial directory. Go to
the 'bin' directory. Select 'julie2_skin1.ftx' and drop it on ftxconvert.exe.
You should get a file called 'julie2_skin1.tga'. This file can be edited
with your favorite paint program. Like Photoshop, Paint Shop Pro or Photopaint.
You can delete now 'julie2_skin1.ftx'.
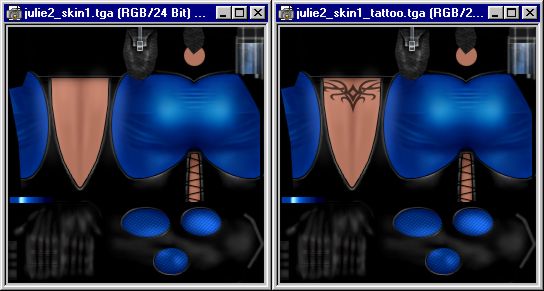
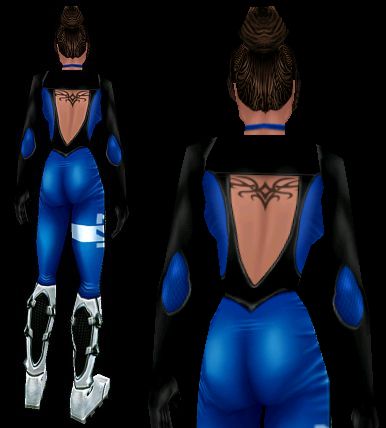
I put the same tattoo
I have on her back. Couldn't think of anything more creative. Feel free
to change whatever you want, but make sure you save the file in 24-bit
and leave the name of the file as it is. You can save in 32-bit if you
want masked areas. But that's not necessary for this tutorial. You can
find my tga and ftx in the 'template' folder.
Go to the 'bin' folder
again and drop the newly created 'julie2_skin1.tga' on tgaconvert.exe.
You should get a new 'julie2_skin1.ftx' file just waiting to be put in
an pk3 file.
Now move 'julie2_skin1.ftx'
back to the 'newjulie' folder. It's time to create your first pak file.
Right click on the
skins folder and Select 'Add to zip'. In the 'Add to archive' textfield
insert the path to the F.A.K.K.2 pak files.
For example 'C:\Games\Fakk2\fakk\'
After that follows
the name of the pak file.
For example 'pak9.pk3'
In the end it should
look like this:
Make sure that 'Include
subfolders' is selected. You can hit 'Add' now. When Winzip is done. Start
up the first level of F.A.K.K.2 and you should see your changes in all
their glory.
|